Friday, December 21, 2012

Bloody Barons Review

I've been so busy with 'Real Life' recently - Christmas preparation, work crisis to fend off, etc.  As such it's been a while since I got any hobby-ish activities done.  Still, that's me off now for 2 weeks over Christmas and the New Year, so hopefully I'll make up some lost time.

To make a start, in any case, I thought I'd post some info on the recently-used 'Wars of the Roses' rules set 'Bloody Barons' by Peter Pig.

This was one that had largely skipped by me, in my occasional hunt for alternate rules-sets.  I got alerted to it by a couple of references from people posting on TMP.  I had a look at the Peter Pig website, and then eventually splashed out on a copy.  

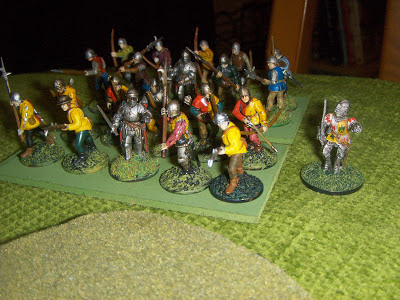
To take it from basics then, the game is for units typically sized at about eight bases each.  The rules typically take each base as a stand of 3-odd figures in 15mm, although I have been using units of ten bases with one 28mm figure per base with no ill effects.  Units are mixed, normally half billmen and half longbowmen, and all units are led by a single Captain base.  As such, the units typically look good to the eye, with an armour-clad noble front-and-centre and a surrounding mix of troops with both bows and bills.  These units are the typical backbone of the armies you'll field, so variety is added by grading them by quality.  Household units are the picked elite for a nobleman's personal force; Retinue units are dependable veterans; and Levy are the untrained and unreliable second-rate masses.  The rules also cater for other unit types such as cavalry, pike, handgunners, cannon, etc.

Generally, control is similar in style to the current trend (Warmaster Ancients, Hail Caesar, etc.) for commanders to roll for each order issued, and continuing to issue more orders until they fail a roll.  This system will probably be familiar to many, and of course it works in terms of making you weigh up the urgency of various orders.  One additional tweak is that an activated unit then rolls a d6 to decide how many action points it gets that turn - so even if a general activates only one unit, a good action-point roll can mean they do more than an opponent who activates many units and rolls poorly.

Combat is a simple and intuitive process - the attacker rolls a fistful of 'to hit' dice, then the defender rolls a clutch of 'saves' for each hit landed.  There are a few extra rolls here and there for things like casualty application etc. but the general notion can be easily grasped and understood.  Large hands of dice are common so you'll do a lot of rolling, and a simple set of modifiers plus a morale system complete the 'mechanics' of the game - which fits neatly onto a single side of A4.  The game plays for a random number of turns, before 'night falls' and a winner is determined by a score of victory points.  

One of the notable features in it is the method for generating scenarios.  Each player gets a pool of dice, which they can then assign to categories like 'Treachery', 'Espionage', 'Supplies' and so on.  Each player rolls for each category to try to build up a score, and the larger the discrepancy in scores, the more dramatic the effect on the game.  This puts in a nice randomness to the setup, dependent on both out-guessing your opponents' allocations and on lucky rolls.  It means games vary a lot, which prevents the 'line them up and crash the two lines headlong into each other' syndrome which can often plague WotR games.

By and large, as you can probably tell by the number of references to dice rolls above, the game is generally dominated by likelihoods - Levy are not likely to stop Household, but they technically can if they have a lucky set of rolls just as their opponent puts in a bland one - all you can do is try and contrive situations where you are likely to triumph, and take your chances.  It's much more authentic than a more rigid x-always-beats-y system which many rules favour, but I know it's definitely not to the taste of some wargamers out there.  

The rulebook also has the usual features such as an army-building points system, historical scenarios, painting tips, etc.  In summary, it's an excellent set for swift-playing WotR battles, with lots of innovative features to keep things fresh, and has clearly been written by people who love wargaming and have designed the rules to provide an eventful game which can be concluded in an evening, and keep all parties involved throughout.  I'd give it a strong 8/10 score, possibly even a 9.  

Sunday, December 2, 2012

The Battle of Holmewood, 1460

Following a speedy approach march, both sides found themselves slowed by an autumn downpour.  Much of the Lancastrian strength was off the field at first, and many commanders remote from their units - hurried orders to concentrate were sent out as soon as the approaching Yorkist army was detected.  Similarly on the other side, the muddy roads forced the attackers to press on and attack piecemeal.  They had an initial advantage in that they were seeking the battle and therefore were well provisioned with arrows, but each side would need to heavily reinforce the initial clash in order to win.

The initial armies - Lancastrians on the lower-left, outnumbered two-to-one by the oncoming Yorkists!

Rutland, commanding the Yorkist Main

Rutland's Ward was largely retinue - the levies being left behind on the approach-march

Salisbury in the Vaward - his ward is small from previous losses, but he's a hardy commander


The battle develops - Norfolk proves sluggish at bringing up the Yorkist Rear through the woods  in the foreground,  but Somerset - the Lancastrian Mainward - boldly strikes forward in the centre and begins showering the Yorkists with arrows.  In the Lancastrian rear, many more units swiftly begin to arrive.

Somerset's Retinue troops prove dangerous, showering the oncoming Yorkists with flights of arrows.  Rutland soon finds himself struggling as losses mount.


Somerset clearly feels on top form today!  Charging boldly at the stalled Rutland, he swiftly overthrows part of their line and sends it fleeing!

The situation develops - Lancastrians (left) continue to get reinforcements arriving - most particularly the Newcastle levies who come up through the village on the left of their line.  On the Yorkist side, Rutland sags before the onslaught, leaving Salisbury on his right exposed in a salient, while Norfolk on the left appears unable to even locate the battle, much less join it!

The wings both finally engage - Norfolk belatedly makes it into battle against the Scots mercenaries,  while Salisbury takes the risky move of attacking the Newcastle levies before they can clear the bottleneck of the village.  In the centre, Rutland has now been halted and is fighting a holding-action!


The battle in the centre, seen from the Lancastrian side.  Neither Salisbury or Norfolk can bring their force to fully bear on the flank, leaving poor Rutland to feel the full weight of Somerset's continuing pressure.

Finally, the battle in the village ends - Salisbury's desperate bid to hold off the whole Lancastrian Rearward with a part of his own command fails, as his captain is killed and the men rout!  Now he's got the Yorkist flank in the air, with thousands of Lancastrian troops bearing down on it.

Salisbury - if not pondering retreat, at least making sure a horse is close at hand!


Somerset's troops continue to batter Rutland's troops, now mowing down the late-arriving levies with longbow fire.

The large contingent of Scots, plus some surviving Percy troops, fight against Norfolk's men and press them hard.

A notable casualty!  As the Yorkists collapse, the Scottish commander - Earl Douglas - is cut down in the melee while Norfolk's men fall back.

Somerset victorious!  As morale collapses on the Yorkist side they take to their heels, leaving the Lancastrian army commander to bask in the glow of triumph!