Friday, December 27, 2013

The Battle of Antietam, 1862

The tides of war have rolled Thaddeus P Hardtack up against the Confederacy once again.  September 1862, the Maryland Campaign.  Hardtack has missed out on the disaster of Second Bull Run, while he had to retire briefly on sick-leave to shake a hankering for 'Hackett's Nerve Elixir'.  Still, with his personal doctor now firmly briefed to confine his efforts to bullets alone, he'c back to the war.  Not a moment too soon, since the Army of Northern Virginia is invading Union soil!  Hardtack marches off with McClellan once again, arriving for the battle along Antietam Creek.  After a morning waiting before crossing the creek and advancing forward, Hardtack is brought out of reserve and ordered to seize one of the low ridges around Sharpsburg which a Rebel force is defending.  

The Deployment

On deploying, it quickly becomes obvious that Hardtack has got a serious numerical advantage - very nearly twice as many infantry as his opponent, and a full artillery compliment.  Only in cavalry, and the advantages of terrain, do the Rebels have the edge.   

The 'old' regiments are in the centre, while the rookies are on the right where a small stream can watch their flank

"Courage lads!  Your bravery shall be well reflected in my promotion prospects!"

The advance begins cautiously enough, so it turns out to be the rebels who move the most!  A few blasts from the artillery batteries - directed by Hardtack's experienced eye - shows just what Yankee artillery is capable of.  The rebels pull back, getting behind the hill-crest and with their cavalry pulled back into reserve, to save themselves from an unnecessary pummeling.  

 Working with the terrain, the original Massachusetts regiments slip in behind each other, into the woods between the two hills.  The rebel artillery moves up opposite, to try and get a few oblique return-shots on the Union, but without exposing themselves to the more numerous cannon firing back at them.  

 The battery in front of the main Rebel hill redeploys slightly, as the right-flank peak is obviously going to be the focus of the battle (the left-flank peak is covered in woods, and basically impregnable - most of the rebel force is massed on the other).

Suddenly, the response that Hardtack has been probing for gets provoked!  When one rebel regiment falls victim to confusion and exposes itself on the forward slopes, the Confederate general clearly decides 'what the hell' and throws the rest forward!   

Who'd have thought it?  The Rebel cavalry is thwarted in its attempt to charge the weaker of the rookie regiments by a marshy area around the stream, which nobody has noticed before now.  Good fortune indeed!  The 27th Pennsylvania gets charged, but the simple size of the regiment allows it to resist the impact and throw them back.

In the woods however, less of a good show!  The 11th Massachusetts tries to skirmish with the Rebels on the left-flank wooded hill, only to realise that the Rebel regiment has companies of sharpshooters attached.  A few minutes' firing reveals how badly outclassed they are!  This is followed up by the Rebel charge off the right-flank hill bearing down on them, as it turns to enter the wood.  In turning, the rebel line exposes its flank to the artillery, who are not slow to take the chance.  


 The Rebel line charges in, yelling away.  The 1st Mass. gets sent reeling, and then after it the 16th Mass. is similarly flung back.  The Confederate infantry has swept the woods clear.

 Hardtack is frustrated in his efforts to get a charge of his own going, as the numerous rookie infantry can't charge against cavalry - most annoying!  Still, they keep blazing away, and over time the numbers firing and the artillery support means that there is a steady drain of Confederate casualties each turn.

 Desperate fighting continues around the fringes of the wood, as the three Massachusetts regiments try to hold the line and stop the centre of Hardtack's brigade from collapsing.  Things aren't helped by the pesky Rebels, who seem to have found some local assistance from pro-secession Marylanders.  
 Having lost almost half their strength, the rebel cavalry gives up against the rookies and joins the fight against the centre, where things appear more hopeful.  

The fighting is close-up and personal; rebels charging forward and falling back, only to charge again.  Their losses are steadily mounting, but the same applies on both sides.  Major Hercules Spatchcock is cut down in the middle of the line, where his regiment - the 16th Mass. - gets overrun and routed by the Rebs.  Finally, the Union pulls back in much-reduced form from the woods.  The Rebels can't exploit any further forward however, as the rookies on the flank have now pressed forward.  The rebs are caught in a salient in the woods, with artillery batteries firing away at them, and the hill to their rear now in danger of being taken while most of its defenders are down in the woods.

Finally, the rebels have to pull back as their losses become insupportably heavy - rather in-keeping with the general Confederate experience at Antietam, you might say.   The Union has won, and Hardtack has his first ever battlefield victory under his belt.   True, he never even went near the hilltop objective, and scored precisely no Epic charges of note, but a win's a win, in his eyes!  The Confederates can even console themselves that they racked up twice as many Epic Points as their enemies (or at least the survivors can.)

Hardtack finished the year satisfied with his progress.  Divisional command still eludes him after such a 'workmanlike' victory, but his brigade has gained a certain 'something' to its reputation.  Experience, in a word - the two surviving 'original' regiments, the 1st & 11th Mass. are now seasoned veterans.  So too is the relatively new arrival 8th New Jersey Infantry.  Other names drop off the brigade lists - the 16th Mass. and 15th New York Infantry are both disbanded as their losses prove so high, and so is the 3rd Pennsylvania cavalry - Hardtack now unambiguously commands an infantry force alone, with no mounted force.  To strengthen him up, two new Rookie infantry regiments are drafted in: the 122nd New York, and the 83rd Ohio.  Hardtack looks forward to a decisive 1863, and hopefully an end to the war.  


Friday, November 15, 2013

The Battle of Ramsay's Farm, 1862

1862 now beckons for Brigadier General Hardtack and his loyal brigade.  Following his fight in the fall of 1861, he's been spending the winter in and around Washington under a new commander: 'Little Mac', George McClellan himself, has been knocking the Army of the Potomac into shape over the winter.  Now it's high time to take the war to the rebels: Hardtack has sailed down to Fort Monroe with the army, marched and dug his way up the Yorktown peninsula, and is now on the very doorstep of Richmond - right in time for the start of the 'Seven Days Battles'.  As the rebels close in, Hardtack's brigade is ordered to hold his portion of the line around a small homestead called 'Ramsay's Farm'...  


The opening conditions
Hardtack initially keeps his artillery on his flanks, but their fields of fire are frustrated by the cornfields.  For the arch-artillerist Hardtack, this is clearly going to be a frustrating day!  The Confederate commander obviously has a healthy respect for them too, and he keeps himself hidden from sight all morning long.


Hardtack pushes very slightly forward with the 11th and 16th Massachusetts regiments, into the cornfields - the Confederates respond by moving forward themselves.  Hardtack is satisfied the 'lure' has worked, and pulls back his regiments.  The three rebel regiments are all tightly bunched in the centre, so whatever else happens there won't be much in the way of awkward maneuvering or flanking this day!

"The perfect 'Arc of Death', Sir!  Shame we can't see them..."
Hardtack angles in his flank infantry regiment and lines up his cannon 'just so'.  The three rebel regiments are packed into a perfect 'killing zone' from all sides.  If the cornfields weren't there, it'd be over in an instant.  However, despite Hardtack's earnest wishes, it insists on still being there!  "How long until the harvest?"  

A close-up on one of the rebel regiments, hiding ignobly - but undeniably effectively - in the field
The hours tick by, with Hardtack increasingly fuming at the rebels who refuse to emerge into his waiting arms.  Seriously, what's to stop his artillery just flinging cannon-balls into the corn?!  Protests about line of sight, ammunition supply etc. rave back and forth between Hardtack and his luckless staff.  His nerves must be stretched to breaking-point by this!

"I refuse to accept there is any problem to which more cannon is not the answer!
With the day growing late, and the initial 'blocking' task pretty well accomplished, Hardtack decides to take a chance and prod the Confederate hornet's nest.  The 11th and 16th are ordered forward again, this time at an angle to strike the end of the three Confederate regiments and prod them into action.  It's heroic stuff to make the papers, which is of course the main objective.

"Where are the enemy?  I can't see them anywh - Aargh!"
The two lines collide practically point-blank in the cornfield, and close-range fighting breaks out!  The Union reel back from the contact, and now the grey-clad Rebels come pouring out of the field all along the line.  It's a headlong attack by the screaming and yelling Confederates!

"Advance rearwards!  Keep firing!"
Benefiting from some local cornstalk-chewing, slack-jawed local, the rebs get the lie of the land and come headlong into the waiting Union line.  Things aren't perfect with the withdrawal however, as the colonel of the 11th Massachusetts gets it into his head that falling back into plentiful supporting lines is a bad idea, and he stays rooted to the spot in a cornfield that is now near-totally filled with rebels - oh, you heroic fool!


Finally visible, the Union lines begin blazing away at the Confederate horde rushing onwards at them, yelling as they come.  This one's gonna hurt!


Crashing into the 6th Massachusetts and the 15th New York, the recruits are driven back with heavy losses by the concentrated rebel mass!  In return however, they fire frantically into the oncoming graybacks.  The Confederates are a heroically determined bunch and take their losses as they keep coming, however - one rebel regiment is led forwards by a hero, who is then shot down, only to be replaced moments later by yet another hero stepping out of the ranks!


Despite taking heavy losses, all Hardtack's regiments manage to stay on the field.  The much-battered 16th Massachusetts is kept going by the Colonel, Hercules Spatchcock - clearly a man to rely on in hard times!  The union regiments even manage a counter-attack at the last minute, charging into the depleted rebels with their even-more depleted forces - what a show of fighting spirit!  Even so, Hardtack is in no doubt that with the farm lost, the sooner the day ends, the better.  The day ends with a stroke of luck: while the rebels are poised to charge yet again and wipe out several union regiments, a sniper shoots the enemy commander's horse out from under him!  By the time the dazed commander is recovered and the Rebel assault prepared, Hardtack has slipped away in the gathering dusk.


So, Hardtack has been defeated, pretty much like the rest of the Union army in the Seven Days Battles.  Time to take stock: he's lost 15 bases in combat, but inflicted about 10 in return.  Decent, but not enough to convince the War Department to give him that promotion he's been after.  All regiments recover, more or less, although the 16th Ma and 15th NY are rather light with only around 200-odd men left.  Time for reinforcements, so Hardtack starts lobbying away at army HQ and gets two new infantry regiments transferred to his command - the 27th Pa and the 8th NJ.  He also keeps on with his favourite hobby-horse, and manages to rig a ridiculous boost to his artillery park: the 6-pounders are replaced with Napoleons, and the number of Light Rifles are doubled from two to four sections.  Hardtack has a rather mediocre infantry force (still no veterans!) but enough artillery to put the moon out of orbit.

Hardtack's time in the field has strained his nerves, and while in the rear he advertises for, and finds, a personal physician to help look after his humors.  Dr. Hackett is added to his personal staff, and provides the great man with his own patented cure-all, 'Hackett's Nerve Elixir' (Ingredients: 2% Tar, 98% Cocaine Powders).  

Surely the next battle shall go better, with this marvel of modern medicine at his disposal?


Saturday, October 26, 2013

Workbench WOTR

The last few weeks have seen various exploits at club, such as the 'Longstreet' ACW campaign, and discovering 'Bolt Action' for WW2 tactical games, but I thought it was high time that I posted something about non-club activities, since it's been a while.  

I've been busy painting up and organising a large amount of Wars of the Roses figures, for the impending climactic struggle between Edward Plantagenet, Duke of York (and soon to be Edward IV, should he win) and Henry VI's puppet-master Edmund Beaufort, Duke of Somerset. 

Here's what my painting table currently looks like:


At present, I have about 60-odd models to finish up painting, out of a grand total of something like 350-ish figures due to go on-table.  Although most of the others are painted, there seem to be a lot of rogue ones here and there which have been painted but then not 'dipped' to given them shading and a protective varnish coat, or properly finished with a grassy base.  So, I'm working away to bring them all up to finished 'army painted' standards.

However, if you're interested in something you can't just put it all on hold while you paint away - I've been looking into getting a pile of banners and standards prepared, to give the armies a good bit of heraldry on display.  It should add quite a lot to the visual appeal of the game, if it goes right!

I have also been reminded, after playing a game of 'Bloody Barons' with Ric at the club, of the importance of Captains to units.  Each unit has one, whose job is to motivate the men, spur them on to fight, and generally keep the whole unit actively involved in the fight!  It occurred to me that it would be a good opportunity to add a lot of character to the game if I could assign historical personages to these roles.  I turned to the superb 'Perfect Captain' database of personalities, and basically ransacked their lists of minor Lords and Barons.  Where possible I have lifted magnates who were at Towton (the nearest historical equivalent to my upcoming battle) and assigned them straight to the various units each magnate has brought to the field.  

With a bit of luck, I may even be able to meet my target of getting the battle played out before the Xmas holidays arrive (eight weeks to go!)


Tuesday, October 1, 2013

The Battle of Spizzler's Crossroads, 1861

The club has been full of talk for some time now, regarding the notion of carrying out a campaign for Sam Mustafa's 'Longstreet' rules.  It's basically a series of linked games, and we seem to have about 10 or 12 willing recruits prepared to raise a brigade and launch their careers, so - last Monday I was on the field for my inaugural fight!

In charge is my fictional and dapper commander, Colonel Thaddeus P Hardtack.  Sharp of eye, square of jawbone - his hobbies include amateur theatrics, overwrought poetic composition, and shooting anybody with inadequate enthusiasm for the Union.  An ex-military type of the old school, with a 'thing' for drilling his troops and a long passion for artillery theory, he finds himself brought swiftly out of military retirement at the outbreak of hostilities.  Volunteering his services to the United States' government, he quickly finds himself in charge of a brigade made up largely of Massachusetts recruits.

Fast-forward swiftly, and we find our intrepid hero leading his men into action for the first time!  An obscure crossroads has been occupied by Confederates - Driftwood's Brigade, to be precise - and Hardtack is set to drive them off!  

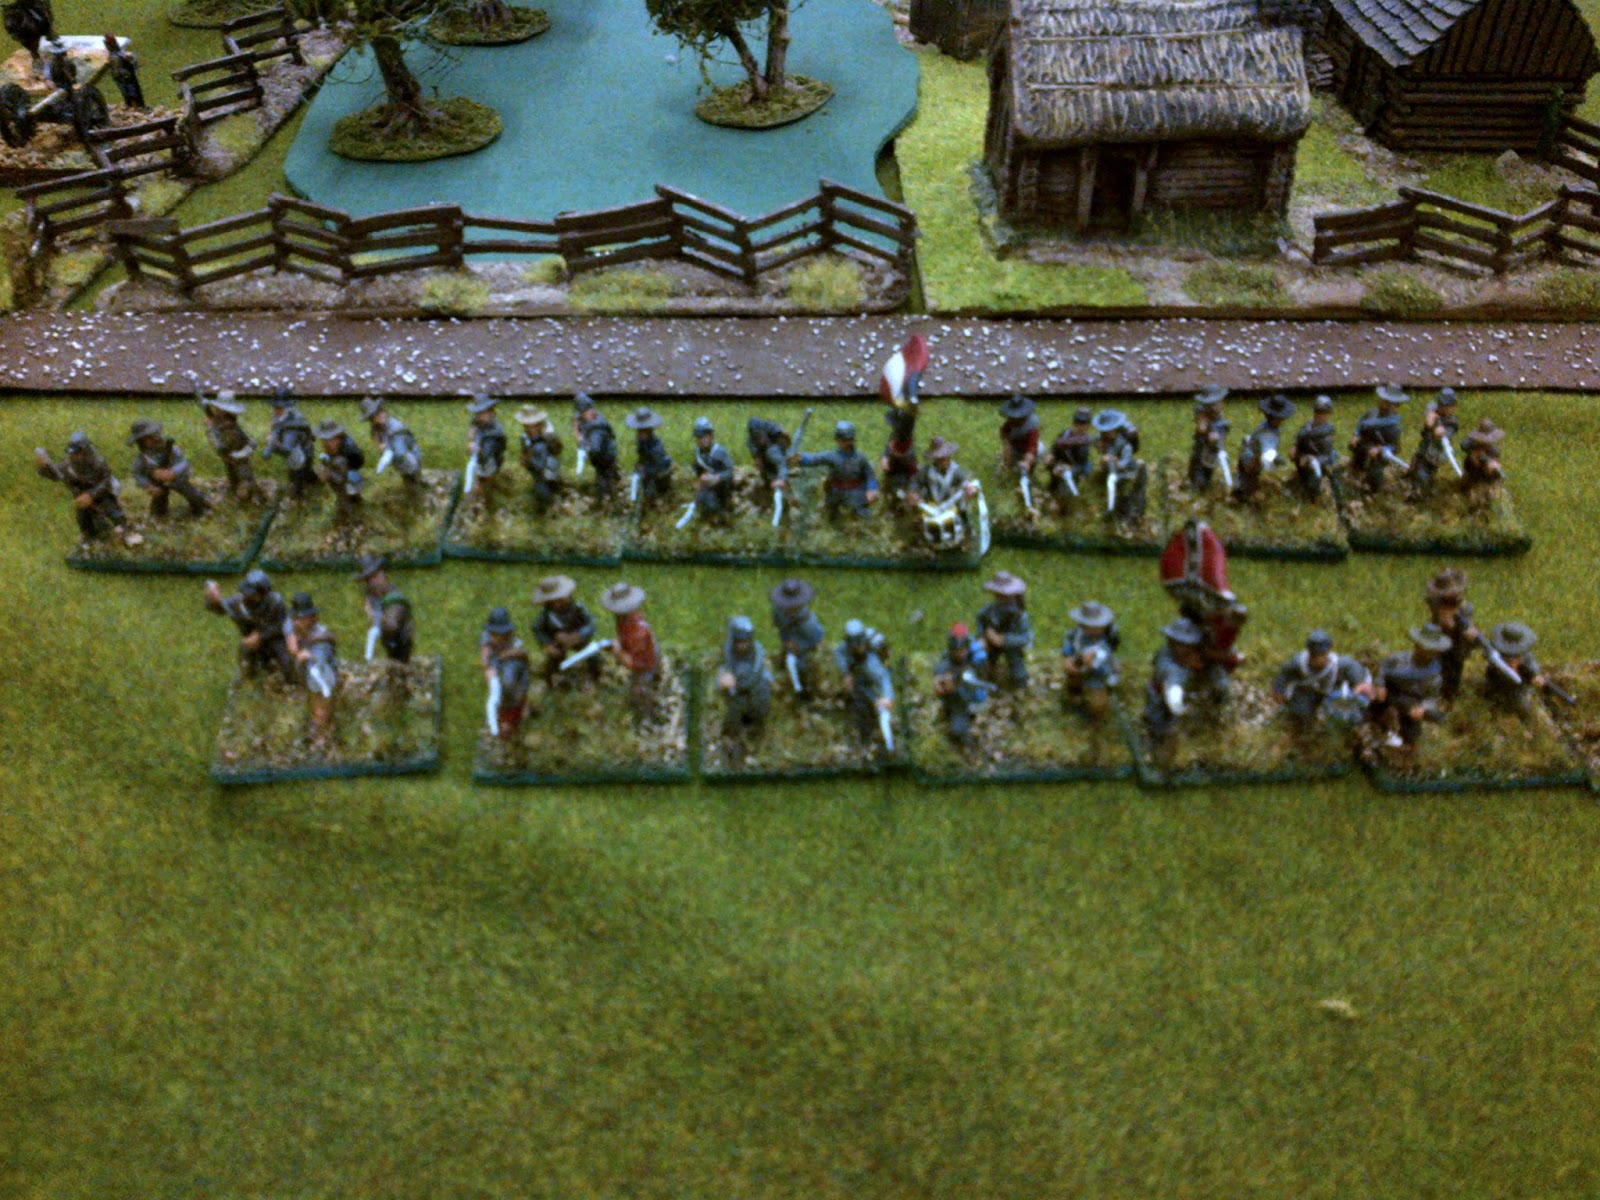
The two lines - Confederates on the left, Union on the right.  Most of the Union strength is on the right of their line, at the very top of the picture.

Planning a straight flanking sweep, he masses the 1st and 16th Massachusetts regiments to occupy a small hill out on the flank, which is defended by a regiment of Alabamians.

"Two against one - just how I like to fight!"
 The Union troops gamely marched ahead, only to be gripped by confusion right before the crest.  The intelligence handed over by the Pinkerton Detective Agency indicated that approximately 100,000 Confederates were certain to be in the area.  What lay behind that hill-top: a division of crazed Texans, waiting to pounce, perhaps?  As Hardtack steeled himself to find out, the Alabama regiment blazed away into the milling blue-coats.

Finally resolving to charge, the Massachusetts regiments surged ahead with a manly 'Hurrah!'  Driftwood himself even had a close shave, nearly being shot down but saved because he had cannily decided to bring along his personal physician.

I like to think I at least shot the doctor.
 Hardtack managed to get in his picture-book charge, thus giving the papers something to write about.  Strangely, the 16th Massachusetts seemed to have a bit of an 'off' day, and didn't give follow-up support (possibly an old rivalry between the colonels, perhaps?  No, surely not...)  It then topped this by failing to even fire helpfully, thanks to them having been issued with obsolete rifles.  Thankfully however the 1st Massachusetts proved equal to the job, and pushed the wavering Alabama regiment off the hilltop!  

"On to Richmond!"
However, this drama on the flank was only part of the tale.  In the centre, things were also going well as the third regiment held the line - and a battery of 'old army' artillery showed the benefits of Hardtack's leadership, blasting steadily away at a luckless regiment of Kentuckians opposite.

"Just like the practice range, but far more satisfying!"
 However, on the Union left the Confederates had been far more successful.  The Union flank was to be covered by the 3rd Pennsylvania Cavalry regiment, but when they advanced forward and dismounted under Rebel artillery fire, they were soon dramatically assailed by the charging grey horsemen, and scattered!

"Wait, men!  You're advancing the wrong way!"
 Infuriated at this turn of events, Hardtack could only watch as the Rebel cavalrymen began menacing the whole Union line - they were even aided by Southern-sympathizing civilians, just to add insult to injury!  (Honestly, you wonder why you bother sometimes...)

The hill (at the top of the picture) is in union hands, but the left flank (at the bottom of the pic) is now all grey! 
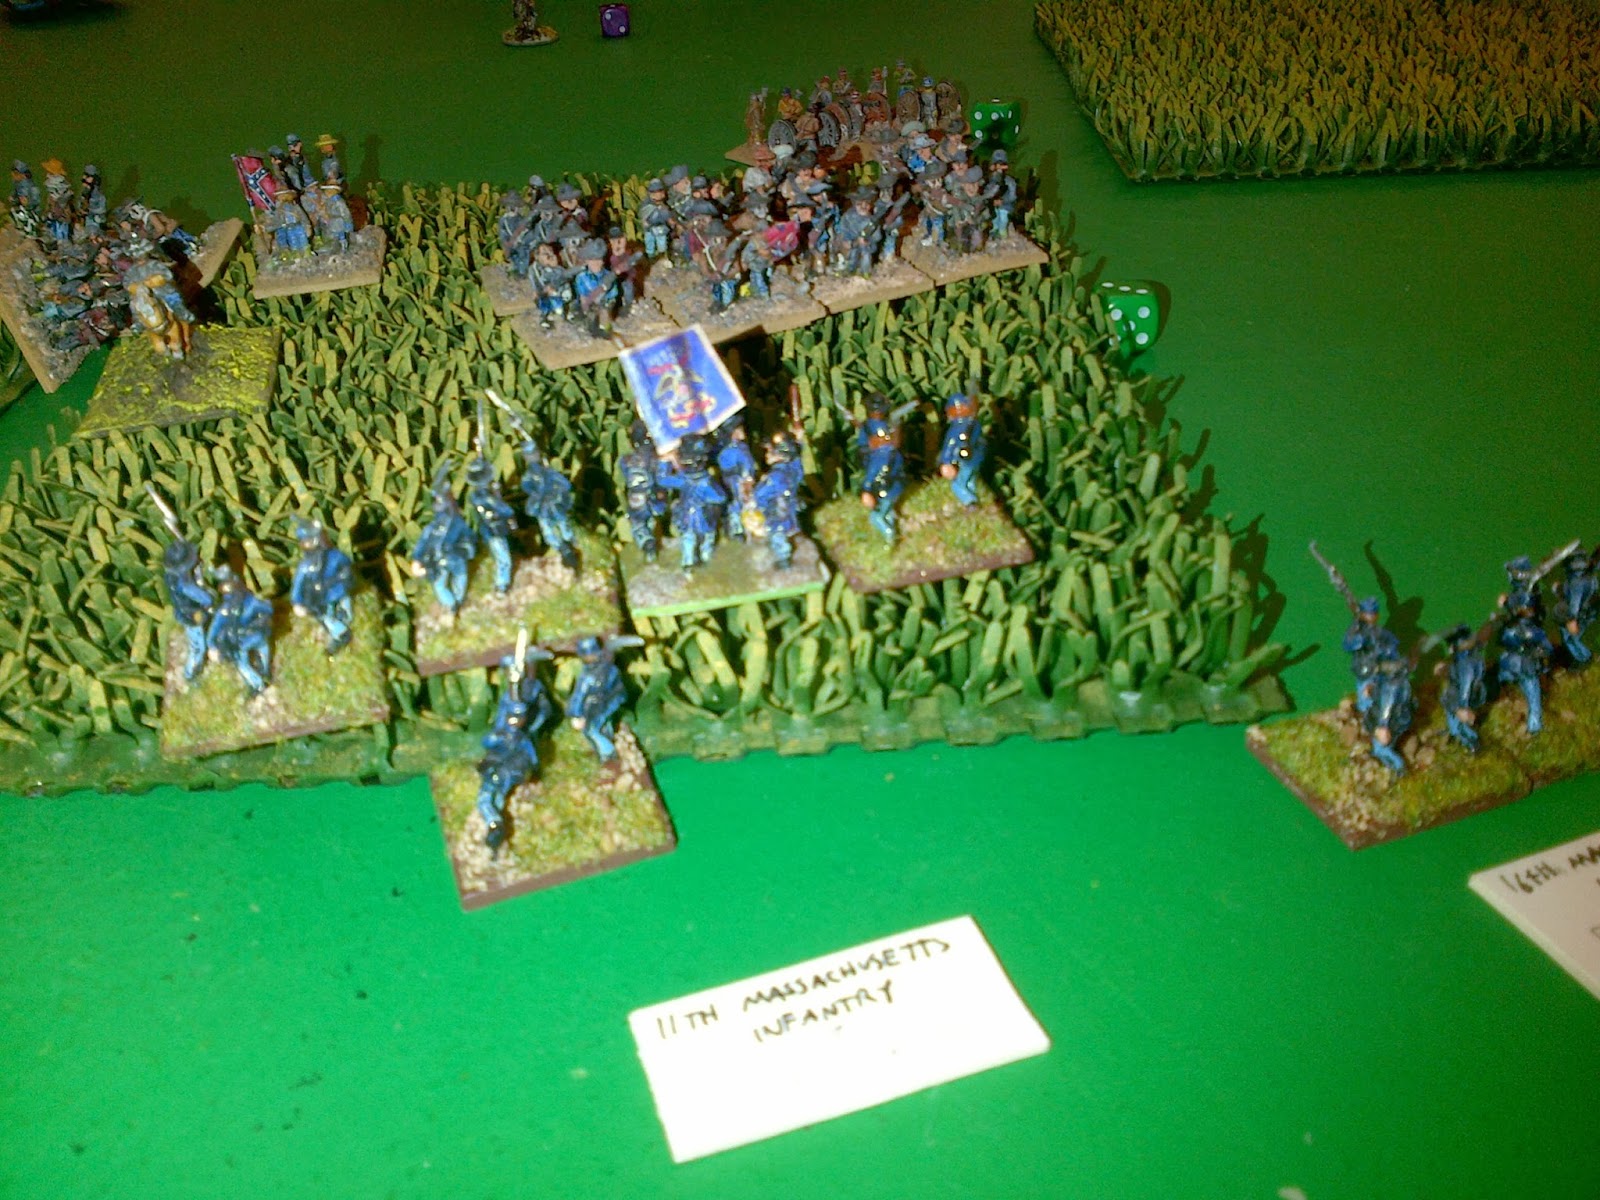
 Things were looking dicey, but luckily Hardtack's long drilling practice paid off - the 11th Massachusetts in the centre was able to wheel backwards, and pulled off the complex maneuver just in time to hit the cavalry with a volley, and repel them.  It was also fortunate that the cavalry colonel didn't obey his orders that closely - no doubt he and Driftwood had some sort of rivalry as well!
Marching, wheeling, and firing - all at once!
 The whole line had pivoted round, as each side had attacked on its right - now things were nearly at right angles, with the Kentucky regiment now getting flanked to add to its miseries.  Despite this, the Union had been stopped on its own right-wing and couldn't press on any further.  Casualties mounted, and what with the Pennsylvanian cavalry already galloping fast for Washington, Northern morale was getting shaky!

"These Rebs just keep coming!"
Finally, after clinging on to pass three break-rolls, the Union morale finally gave way.  The crossroads was out of reach, and Colonel Hardtack had to fall back and leave the field to the Rebels. 

The Rebs won, and with one of their regiments not even getting properly engaged!
 Still, it was a hard fight - and Hardtack gave as good as he got.  He'll be back, and no doubt next time he'll deal the forces of Secession an even sterner lesson!
Time to Skedaddle!
After the fight, Hardtack could at least point to the fighting spirit of his men as evidence of his own bold style, and he happily managed to secure a promotion in the rapidly expanding army!  Even better was to follow: thanks to the kudos attached to his name, the War Department favoured a Railway company he had been linked to in his pre-war days, and awarded them a massive contract.  Hardtack is rich, rich beyond his wildest dreams!  

The 'golden gaze of fortune' continued in military spheres too - the Army command attached a 4-gun battery of Light Rifles to his Brigade, to see what his proficiency in gunnery could do with them; and also transferred across the 15th New York Infantry Regiment to bolster his force.

Roll on 1862!

Sunday, September 22, 2013

'A Century of War' - Games Day

Unusually, I spent my Sunday out at the FDWC - as they were running a day of games themed around 'A Century of Warfare'.  Specifically: the 20th Century, so it was all games ranged from the Boxer Rebellion though both World Wars, up to the present day.  I took a few pics on my phone, so excuse the sometimes slightly shaky focus:


First game I played was from the Sudan in 1904 - just barely into the new century, but with my luck I did indeed wind up on possibly the last side that could have turned up with spears as their main weapon!  


The game was an 'old school' classic style affair, made up entirely of 1/72 plastic miniatures on individual bases.  The Mahdist forces (part of which were led by yours truly) awaited the Brits in a dried-out Wadi, screened by low hills and heavy brush to their front.


The Brits had very few genuinely British units, with the Empire providing many more to make up the force.  They began slowly making their way forward...


Above is the general, accompanied by his mobile pack-mule-mounted 'Officers Mess' (i.e. drinks cabinet!)


The centre saw the British artillery lob shells into the suspected enemy, and then before long the ill-disciplined mob gave up waiting in the Wadi and came flooding out.  Results were predictable: volleys of rifle-fire mowing down the hapless infantry.  


Far better results came on the flanks, where cavalry pounded in fast before the machine guns could cut them down, and got into close combat, routing their opposite numbers.  Also, the infantry approached far better under cover in the brush (cleverly modelled from grape-stems), getting into combat yet again.  Sadly the losses were too high for this to last for long, so the Mahdists quit out - a tactical victory for the Brits, but with their cavalry force routed it was at least the end of their campaign hopes in tracking down the mobile raiders.


Although I didn't take part in this game, I wanted to take a picture due to the sheer size of it!  A massive game of the Boxer Rebellion, where a small team of international soldiers tried to take on teeming hordes of 28mm Chinese Boxer Rebels.  Marvellous scenery, and miniatures!


I personally wound up playing a game of 'Chain of Command' for the first time, playing a British platoon in Normandy as it tried to storm a small village.  It was a quirky system for activating and controlling units, which wasn't really like anything I'd done before - so, this uncertainty aside, we did quite well.  We lost, of course, but lost in style: good tactical play, but bad luck on dice-rolls that caused too many popular NCOs to get hit, so the platoon did sterling work about half-way up the table, but could then take no more.

All in all, a god and fun day!  My next club task is to take 'Bloody Barons' in for a one-off WOTR game, so fingers are crossed it goes smoothly.  :-)

Tuesday, August 20, 2013

ACW Game - Longstreet 'Lite'

Those with long memories (or too much time on their hands - I'm not here to judge!) may recall that a few months ago I completed a pair of ACW armies and promised to soon post pics of the based results.  Well, what has happened with it all?  For one thing, after the frantic speed of painting them all I was so overdosed on ACW Union infantry I just wanted a complete break from them all.  After that however, there came the realisation from me that I could be about to completely change the basing system.  

This last point came from me joining the Falkirk District Wargames Club (FDWC) over the last few weeks, and learning about the upcoming 'Longstreet' rules for ACW that were coming out.  They favour multi-based units with roughly 6-8 bases as the typical norm, and in the 60x30mm bases of 4 figures each, it all looked like a skirmishing line to me - I was not happy!  

At club however, a trial game was held to see how the 'Lite' version of the rules played (ironically we wound up trying them out on Monday, the very day the full set came out!)  I joined in to play a game with another members' 15mm collection, hoping to get a bit of inspiration.  Some pics of the game are below.


The battlefield at the start.  Nice fences, made of matchsticks!

Rebel infantry in its natural form - streaming ahead towards a Union line!

The basing system here uses 3 figures a base, in a slightly offset line.  It can look a bit odd on a solitary base, but actually looks quite good by the unit. 

Two regiments together.  I think I'll go for the same with my 1/72 figures, possibly on a 30mm or 40mm square base.

I played the Union, and although my brigade nearly broke it managed to steal a win at the very last turn by the use of the 'Withering Fire' card, cutting down scores of Rebels in a hail of fire and a series of lucky rolls, which saw their morale break just ahead of mine.

And yes, I have the full set of rules now on order...

Sunday, July 14, 2013

Maurice - Austrians v Prussians


After a few weeks of going along to the club and joining in with other peoples' games, I felt I should bring along something of my own to contribute.  The perfect chance came along with a decision to play a game of 'Maurice' for the Seven Years' War.  The 'Maurice' rules are by Sam Mustafa, and one of his earlier rulesets was 'Might and Reason' - which used to be my old favourite!  We gave it a go one week to try out, and the following week I offered to bring along my 15mm Prussian & Austrian figures for a replay.

The results are in the photo above!  Unfortunately I was only able to take one or two pics on my mobile, as you tend to get caught up in the game with other folk there at the club.  I went the Prussians, attacking an Austrian line spread out across a low hilly region.  I had intended to flank the line with some fancy marching, but sadly it was not to be - the Austrians played a surprise card (appropriately called "That's not on the map!") which let them place an unexpected piece of terrain - the large marsh you can see on the left of the above photo!  My plan derailed by this, I switched quickly to screening both flanks and simply blasting through his centre - the clash of the two infantry lines can be seen above.

Thanks to some 'national characteristic' cards I could count on the Prussian infantry having an advantage over their foes in a one-on-one fight, but somehow the cards never quite panned out that way.  Numerous 'upset' cards that reduced fire effectiveness or prevented firing just seemed to keep on turning up.  Also, many units that were wavering pulled off some spectacular rallies to keep the fight going.  In Maurice you play cards to keep units active, and the fighting in the centre was so intensive that both sides were forced to keep on playing cards turn after turn to prevent a collapse, as opposed to bringing in other units on the flanks into play.

The end result was a scrappy draw, with a possible nominal win going to the Prussians - or whatever was left of them - as their advantages finally tipped the battle for the centre their way.  Not a particularly elegant one, however - just a heads-down victory by battering away headlong at the enemy, and winning through the infantry training as opposed to leadership!  ;-)

Two after-effects of the game are that there is now talk of possibly doing a campaign of games, using the Maurice system for linking them together.  Not sure if there's enough people for it, plus of course we haven't necessarily all got collections in the same scale, but the notion is appealing.  The second is the realisation for me, which would have slipped past me without somebody mentioning it, that a new Maurice-style game for the ACW is about to come out from Sam Mustafa!  Having just finished up painting my two armies for ACW, and being quite taken with the Maurice-like card system, I'm actually eager to get the rules and see about getting my figures organised for using with the upcoming new rules.