AAAaaaarrrgghh! Is there any annoyance in a wargamer's life to compare with a much-anticipated delivery not arriving? (Probably not, beyond the time when I accidentally misjudged picking up some marching Musket-troops and got a line of bayonet-wounds in my hand.) As of the time of writing, no sign of the delivery of the Wars of the Roses Army.
I sent the order on tuesday, thinking 'wednesday if I'm lucky, but count on thursday.' Nothing on Wednesday, so fair enough. Thursday - nothing. Hm. Still, no cause for alarm. There's still friday, and then even if that fails there's saturday morning, so I'll still be able to do something over the weekend. Friday - nothing. Then, damningly, Saturday - nothing! Can Royal Mail really be playing mind-games with me? Does the postman secretly hate me? Is there somebody down at the sorting office with a hankering for late-medieval 6mm figures?
So, the weekend has been spent in something of a wasted-time zone, with me reading up about livery colours and banners to fill the gap. Come on Monday - all my hopes lie with you!
Sunday, November 22, 2009

Tuesday, November 17, 2009
Planning Projects
There have been some new developments afoot, which I thought I'd relay on the blog. The ACW campaign is still on the go, although 'real life' has compelled me to tidy my board away right now and make some space. Soon, I'll return to it! In the meantime, as the blog is meant to cover all my wargaming activities, I thought I'd bring news of a new project.
I pondered a new period for a while, and spent much enjoyable time planning out what I was going to do. The options it finally came to were a pair of Thirty Years' War armies or a set of Wars of The Roses troops. I finally plumped for the latter, and then spent time mulling over scales and daydreaming as I shopped cheerfully around online. I was going to do it in 28mm, then 15mm, then 28mm again, then not at all, then 28mm, then 6mm, then 15mm. An absolutely crazy process, but highly enjoyable! In the end I selected 6mm, not least because in these days money is tight, time tighter, etc. (I'm sure you know how it is!)
What finally swung it was the Baccus 6mm armies and deals. To put it in perspective, a sum of about £30 would have bought me a pretty decent set of figures in 28mm, which I could probably have made a few units with. The same sum in 6mm could buy me an entire army!
My aim isn't just to 'do' the WotR entirely, but to at least partially do it in another form. For some time I've been running a medieval campaign of my own (unpublished on the internet, but written up in my notebooks) for the "Kingdom of Lavancia" as I call it. Lavancia is a fantasy realm in the Late Middle Ages, torn apart by fractious Dukedoms and noble houses. It was initially used by me for my old DBA 15mm Hundred Years' War armies, but I've rather gone off this option. DBA is actually quite poor for doing the HYW, as the variety of troops drops away and a lot of DBA's fun is lost. Plus, bases of four men I painted years ago tend to look a bit underwhelming to my eyes now, after appreciating the impact larger bodies of troops can have!
So, my initial campaign will continue but I'll be widening the timeframe an almost imperceptible amount from the Agincourt, French Conquest, Joan of Arc phase of the HYW and adding in the WotR. I'm also switching away from DBA, as I have recently come across Basic Impetus. It looks more interesting, still admirably simple, plus it requires very few bases to field an army. I can, with only a few tweaks, field the armies listed for HYW English, French, York, and Lancaster. It all sounds pretty good, so I'm all set to go and recount here my full army-collecting progress! The order has been placed, and I'm currently awaiting delivery.
I pondered a new period for a while, and spent much enjoyable time planning out what I was going to do. The options it finally came to were a pair of Thirty Years' War armies or a set of Wars of The Roses troops. I finally plumped for the latter, and then spent time mulling over scales and daydreaming as I shopped cheerfully around online. I was going to do it in 28mm, then 15mm, then 28mm again, then not at all, then 28mm, then 6mm, then 15mm. An absolutely crazy process, but highly enjoyable! In the end I selected 6mm, not least because in these days money is tight, time tighter, etc. (I'm sure you know how it is!)
What finally swung it was the Baccus 6mm armies and deals. To put it in perspective, a sum of about £30 would have bought me a pretty decent set of figures in 28mm, which I could probably have made a few units with. The same sum in 6mm could buy me an entire army!
My aim isn't just to 'do' the WotR entirely, but to at least partially do it in another form. For some time I've been running a medieval campaign of my own (unpublished on the internet, but written up in my notebooks) for the "Kingdom of Lavancia" as I call it. Lavancia is a fantasy realm in the Late Middle Ages, torn apart by fractious Dukedoms and noble houses. It was initially used by me for my old DBA 15mm Hundred Years' War armies, but I've rather gone off this option. DBA is actually quite poor for doing the HYW, as the variety of troops drops away and a lot of DBA's fun is lost. Plus, bases of four men I painted years ago tend to look a bit underwhelming to my eyes now, after appreciating the impact larger bodies of troops can have!
So, my initial campaign will continue but I'll be widening the timeframe an almost imperceptible amount from the Agincourt, French Conquest, Joan of Arc phase of the HYW and adding in the WotR. I'm also switching away from DBA, as I have recently come across Basic Impetus. It looks more interesting, still admirably simple, plus it requires very few bases to field an army. I can, with only a few tweaks, field the armies listed for HYW English, French, York, and Lancaster. It all sounds pretty good, so I'm all set to go and recount here my full army-collecting progress! The order has been placed, and I'm currently awaiting delivery.
Wednesday, October 28, 2009
Grand-Tactical Level
I haven't posted for a while, due to a wry neck putting me out of action for a week. The doctor diagnosed it and used the proper medical name, torticollis, which I thought sounded rather like a type of pasta-shape. Oh well, the end result is: I'm fine now, but wargaming went on hold for a few days! Now I'm back, I'd like to cover an area of the campaign I've missed before now: the grand-tactical level.
On the strategic map I've got area boxes which cover the nominal town or city, plus a fair bit of the surrounding countryside, which have to get transferred in a realistic way to the tabletop. On official campaigns you regularly get randomly generated battlefields, which is perfectly acceptable, but I personally like to have a 'real world' for campaigns with numerous possible battlefields that can be selected and marched to, avoided, flanked, etc. I think it adds a whole lot more. The drawback is that I don't want to map an entire country as I'd spend all my time on map-making rather than playing!
So, enter the area box - in close-up! Each area on the strategic map is split up into an 8 x 8 grid of smaller squares, each of variable 'real-life' distances but of 1ft x 1ft on the tabletop. Out of this, there are potentially 49 different DBA-sized battlefields in a single area. Here's an example:

The Union has a reasonably active August 1861, and sends it's cavalry to occupy Greenock, securing the Rebel-sympathising southern bank of the Clyde estuary leading out of Glasgow. Sadly, the city's shipyards don't yet have total access to the sea, as the northern shore is firmly in rebel hands - for now. More serious is the movement unfolding against the Rebel army that has siezed Falkirk. The trained core of the Union army is at Kilsyth to the west, and attacks them - but in a surprise move, the large army of militia troops in Edinburgh marches in from the east! It's a grand plan, Napoleonic in scope, which will no doubt earn the promising officer George McClellan a command if it should succeed. Now for a closer look at the Falkirk Map Area.
 And here it is, drawn on an 8x8 grid! In terms of accuracy to reality, I'd say the map is 10% Reality and 90% Fantasy, but that's all that's needed! I've used the actual town names, placed them relative to each other, and drawn the only significant physical feature, the river Carron, on quite accurately. The road network, woods, hills, and railways are all invented. Pretty much the only modifications for 'reality' came when I looked up some towns on wikipedia and learned some minor fact, but adding in anything like this is pure whimsy - just for the fun of it! It's also worth pointing out that certain thudding inaccuracies will simply be ignored. Stirling, for example, will be mysteriously going without a medieval castle over it's town centre, as 19th Century America tended not to have too many of these!
Anyway, I didn't have time to detail this before the earlier first-encounter battle by the river Carron, but marked on above was how the armies first approached and engaged. The union occupied a slight salient in the river and blocked the main road routh to Falkirk from Stirling (the fictional road network does link in with the strategic map's connections to other areas.) Alas for them, the wily Beauregard souted them out with his superior cavalry and flanked them on the Grangemouth road to gain his close-fought victory. Now though, he is in posession of Falkirk and needs to fall back fast from the Blue pincers, if he doesn't feel like taking on odds of three to one!

With his cavalry watching the roads, he immediately detects the rival Federal army from Kilsyth as it approaches Larbert, plus shortly after this his other cavalry screen detects the larger Federal army coming from the direction of Livingston. Cavalry screens are shown above as dotted red lines, can see 2 squares, plus roughly a half-square if on a hill (I arbitrarily decided.)
Faced with this, Beauregard abandons Falkirk in record-time and begins pounding up the Stirling road, his position folding up like a collapsing bag. Movement on roads is twice as fast as movement across country, so the closest Union army takes Larbert and then sees it's movement slowed, not to mention the cavalry skirmishers slowing things yet more. All movement is simply done relative to each other, so as the Union move 'x' squares, so the rebels move 'x' squares. As such, without the need for a tabletop battle (and I'd been half-expecting a fighting retreat one around Larbert) the rebels escape. No doubt happy at winning a battle and escaping, they can be quite pleased with the disruption caused. Likewise no doubt General McClellan will be happy that he has beaten a rebel force which his spies inform him doubtless outnumbered his own several times.
Sunday, October 18, 2009
July 1861

Time is short at present, but I thought I'd post a little 'teaser' at least, to show you the strategic shape after the first battle of the war. Following the Confederate victory at the River Carron, each side has an exposed army protruding into enemy space - the Union at Kilsyth and the Rebels at Falkirk. The Union has superior forces but also has to keep heavy garrisons in the key cities to ensure they stay unassailable. The Rebels have been digging entrenchments at Stirling and Dumbarton, making shifting them a far tougher prospect. The recent victory gives their army some experience, but the road network in the Central belt is well developed and there is no real prospect of cutting the Union in half. The Glasgow-Edinburgh link can be disrupted, forcing massive Union detours, but an outright break would require such a deep and secure penetration that by the time the Rebels could make it, they'd have effectively won the war anyway! Strategically, there seems little to gain on the offensive, putting the Union in the position of having to do all the attacking.
Elsewhere in Scotland, not shown above, there has been some minor activity up in the highlands. The Union enclave at Aberdeen has dug itself in, and new Rebel recruits have been mustered at Fort William, securing each end of the Great Glen.
That's the situation for now. Next up: the Union attempts to up the pressure...
Wednesday, October 14, 2009
Battle of the Carron
On the banks of the river Carron, slightly north of Falkirk, the Union army under General Wilcox deploys along the river-line. Rebels are visible off in the distance.
 However, the rebels under General Beauregard have spied out the position and are crossing a few miles up the stream, on the road by Grangemouth.


 However, the rebels under General Beauregard have spied out the position and are crossing a few miles up the stream, on the road by Grangemouth.
The union responds surprisingly rapidly, and rushes troops to face the enemy when the cavalry clashes with it's opposite number.
The rebels press on with half their force, hoping to beat Federal reinforcements to the front.
 Union troops come rushing up at speed, but the rebel cavalry has potentially turned the flank of the Union line.
 The firing breaks out, and each side loses about half it's force as the militias collapse into helpless disorder. Fighting for the rebels goes best nearest the river.
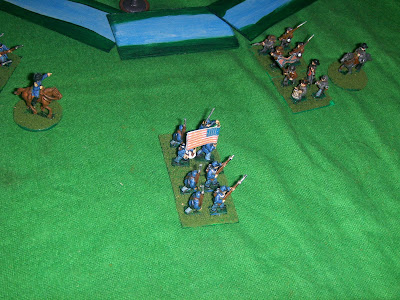 The rebels press on, turning to outflank the enemy line...
 In the nick of time, Union reinforcement divisions arrive on the scene. The grey cavalry are scattered and the infantry sent reeling back on their own reinforcements.
 The hesitating unionists are delayed by small skirmishing groups of Rebels while the remaining infantry form up.
 The reformed battle-lines clash...
 Taking losses, the union keeps it's line straight by giving ground to the screaming rebels.
 Disaster for their morale as casualties mount, including the Northern General Wilcox.
 The union line is as bent as a snake-rail fence, but can the last division out on the flank save the day?
 With a crisis at all points on the line, the reinforcing division sends it's brigades in all directions to try and staunch the flow of troops rearward. It quickly descends into chaos.
 Giving the rebel yell, the grey troops are only barely held back by artillery fire point-blank.
 Once again the rebels turn the flank by the river, leaving the cannon dangerously exposed, and the disarrayed infantry are in no state to reform.
 The exhausted Union troops flee to the rear, leaving the field to the exultant Confederates!


Union troops come rushing up at speed, but the rebel cavalry has potentially turned the flank of the Union line.The firing breaks out, and each side loses about half it's force as the militias collapse into helpless disorder. Fighting for the rebels goes best nearest the river. The rebels press on, turning to outflank the enemy line...In the nick of time, Union reinforcement divisions arrive on the scene. The grey cavalry are scattered and the infantry sent reeling back on their own reinforcements.The hesitating unionists are delayed by small skirmishing groups of Rebels while the remaining infantry form up. The reformed battle-lines clash...Taking losses, the union keeps it's line straight by giving ground to the screaming rebels.Disaster for their morale as casualties mount, including the Northern General Wilcox.The union line is as bent as a snake-rail fence, but can the last division out on the flank save the day? With a crisis at all points on the line, the reinforcing division sends it's brigades in all directions to try and staunch the flow of troops rearward. It quickly descends into chaos. Giving the rebel yell, the grey troops are only barely held back by artillery fire point-blank. Once again the rebels turn the flank by the river, leaving the cannon dangerously exposed, and the disarrayed infantry are in no state to reform. The exhausted Union troops flee to the rear, leaving the field to the exultant Confederates!Sunday, October 11, 2009
The Armies
The armies themselves can be put on the tabletop in either 2mm or 15mm form, but as I've just finished painting up two 15mm DBA-style armies, I'll probably be using them the most. The Strategic game 'A House Divided' rules uses counters to represent a significant body of troops, presumably about 10,000+ men per counter (no definition better than this is given, so we'll just play along.) They can be militia, regulars, or crack troops. At first, absolutely everyone is militia, so as we're all in the same boat no greater distinction is needed just yet! As the war progresses, training and combat-experience will steadily turn our volunteers into hard-bitten veterans!
First, the forces of Union! Using the DBA 1500+ expansion rules and army lists, I've assembled what will be my fundamental Union force:
 The massive majority is Rifles (Rf), who are ten of the twelve bases. The remaining two are the Cannon (Cn), and the dragoon cavalry (Dr). I did this primarily because I wanted to have the Union to be pretty infantry-heavy, so the boys in blue wouldn't very often find themselves outnumbered other than locally. I had to have artillery of course, plus some cavalry force, however inadequate, for scouting work. The full list is: 10xRf, 1xCn, 1xDr.
 The rebel forces are mainly around Stirling, with a smaller force in the west around Dumbarton. They're linked by the Forth valley, which runs between them and to the north of the large range of hills in the middle. These hills are the Campsies, and although they block any Union movement, the Rebel forces are too far apart from each other to be mutually supportive. In other words, if one gets attacked, it's on it's own and won't get any help from the other until it's all over!
First, the forces of Union! Using the DBA 1500+ expansion rules and army lists, I've assembled what will be my fundamental Union force:
 The massive majority is Rifles (Rf), who are ten of the twelve bases. The remaining two are the Cannon (Cn), and the dragoon cavalry (Dr). I did this primarily because I wanted to have the Union to be pretty infantry-heavy, so the boys in blue wouldn't very often find themselves outnumbered other than locally. I had to have artillery of course, plus some cavalry force, however inadequate, for scouting work. The full list is: 10xRf, 1xCn, 1xDr.
Next up, the Rebs:
Defined mainly by the Union force, I found myself getting basically the same army for the south (the army lists are too flexible and you can form whatever force you like) and then adapting it to get the numbers of infantry down. 7 bases are the ubiquitous Rifles, plus a single Cannon again. I gave the army two cavalry bases so they could have an 'edge' tactically over their rivals (as was historically the case.) The final two were a troop type wholly absent in the Union army, light infantry classed as Jagers (Jg). These would represent lighter concentrations of troops that could support the friendly Rifle bases, and pin down enemy ones. Quite a good way to represent a smaller Rebel force confusing and distracting a more tactically clumsier Union rival, as was so regularly the case - especially in the earlier part of the war. Full list is: 7xRf, 2xJg, 2xDr, 1xCn.
So, let's prepare for some fighting! Here's a close-up of the Central Belt, which you can no doubt view on any internet map site. I've marked up the one below to show the situation.
 The rebel forces are mainly around Stirling, with a smaller force in the west around Dumbarton. They're linked by the Forth valley, which runs between them and to the north of the large range of hills in the middle. These hills are the Campsies, and although they block any Union movement, the Rebel forces are too far apart from each other to be mutually supportive. In other words, if one gets attacked, it's on it's own and won't get any help from the other until it's all over!
 Not that attack is particularly likely anytime soon. The Union forces are typically scattered, but for a massive concentration is located on the critical city of Glasgow. No real move north to Stirling is possible in strength until this city is 100% safe against a rapid descent by the rebel force at Dumbarton. Consequently, the opening Union moves in the war are decidedly meek. Work begins on fortifying Glasgow, to protect it's garrison. A small component of this force is sent north to Kilsyth, in order to secure North Lanarkshire and prepare the way for a stronger advance later (it keeps those 'On to Glenrothes!' boys in the newspapers happy...)
However, Rebel hopes of success will not be met by sitting passively back, especially when the chance of a bold stroke is there! The chance to establish an inferiority complex and upset the Union in their heartland is too good to pass up! Half of the Rebel force in Stirling is kept in place to prevent it being taken, while the other half strikes at the 2PP town of Falkirk, aiming to wreck the Union force in the area and cut one of the most direct links between Glasgow and Edinburgh. The Union force moving forward at Kilsyth will be of no support, as to come to Falkirk's aid would mean moving away from supporting Glasgow. The meddling politicians in the Capital would never allow it! Looks like we have a straight one-to-one fight coming up, on the banks of the small river Carron, to open the war.
Wednesday, October 7, 2009
Campaign Map
My first task for the campaign was to make a map for the armies to fight over. As I’m using the rules of ‘A House Divided’ this meant it would be a straignt area-to-area map of boxes for key locations, linked by roads or railways or seaports. There was also the matter of production points. For this, I decided to make liberal use of Wikipedia and base things primarily on population. After only the briefest of checks, it was clear that info on Scotland’s population, industry and Railway networks of the 1860’s was not of use at all - I’d have to launch a major historical research project! I rapidly decided to use only present-day information, as this was readily available. This would mean certain ‘new towns’ only built after WW2 to ease overcrowding in Glasgow would anachronistically be created in 1861, but I overcame this problem simply enough – I just decided I didn’t care!
Production proved easy enough to work out. Scotland has a population of about 5.2million, so by taking 1 Production Point (PP) as representing about 100,000 people, I quickly managed to knock together a numerical value for each major city, up to a total of 52PP’s on the map. For the rural population, I took the total for each local council region (equivalent to U.S. States, I suppose) and applied it to whichever town was where the council offices were based – the administrative heart where any rural recruits would be assembled anyway.
The overall geography was pretty easy to map out. Scotland is (running south to north) first hilly border-country, then the narrow ‘waist’ of the country at the roughly 40-mile wide Central Belt where most of the population is based - principally in the two major cities of Glasgow in the west, end Edinburgh in the east.
After this, the landscape generally builds up into the mountainous
So, I picked the large cities and towns as ‘areas’ for the map, marking up a photocopied roadmap to sort it out, and drew out the roads & railways as they exist in the modern day (much easier in the Highlands, as the terain usually limits you to only one or two big roads out of each town. I assigned the PPs to each town and got a pretty decent spread.
I then spent a quite enjoyable amount of time randomly swapping ownership of various combinations between the
Nevertheless, as you can see from the map below, I generally sorted things out along these lines. The Union has the Borders and the Central Belt, while just northwards of the bottleneck ‘waist’ we have the Rebellious States, with their centres of power in Fife (the ‘Virginia’ of the Rebellion) and in far-off Inverness (like New Orleans, a major city far in the rear, but vulnerable to Naval attack.) The city of
Next, the armies themselves!

Subscribe to:
Posts (Atom)