On the banks of the river Carron, slightly north of Falkirk, the Union army under General Wilcox deploys along the river-line. Rebels are visible off in the distance.
 However, the rebels under General Beauregard have spied out the position and are crossing a few miles up the stream, on the road by Grangemouth.


 However, the rebels under General Beauregard have spied out the position and are crossing a few miles up the stream, on the road by Grangemouth.
The union responds surprisingly rapidly, and rushes troops to face the enemy when the cavalry clashes with it's opposite number.
The rebels press on with half their force, hoping to beat Federal reinforcements to the front.
 Union troops come rushing up at speed, but the rebel cavalry has potentially turned the flank of the Union line.
 The firing breaks out, and each side loses about half it's force as the militias collapse into helpless disorder. Fighting for the rebels goes best nearest the river.
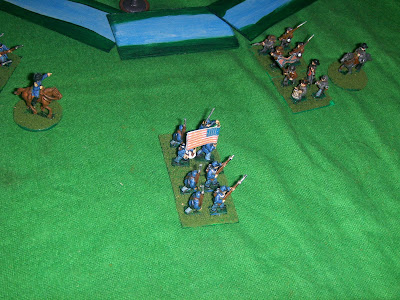 The rebels press on, turning to outflank the enemy line...
 In the nick of time, Union reinforcement divisions arrive on the scene. The grey cavalry are scattered and the infantry sent reeling back on their own reinforcements.
 The hesitating unionists are delayed by small skirmishing groups of Rebels while the remaining infantry form up.
 The reformed battle-lines clash...
 Taking losses, the union keeps it's line straight by giving ground to the screaming rebels.
 Disaster for their morale as casualties mount, including the Northern General Wilcox.
 The union line is as bent as a snake-rail fence, but can the last division out on the flank save the day?
 With a crisis at all points on the line, the reinforcing division sends it's brigades in all directions to try and staunch the flow of troops rearward. It quickly descends into chaos.
 Giving the rebel yell, the grey troops are only barely held back by artillery fire point-blank.
 Once again the rebels turn the flank by the river, leaving the cannon dangerously exposed, and the disarrayed infantry are in no state to reform.
 The exhausted Union troops flee to the rear, leaving the field to the exultant Confederates!


Union troops come rushing up at speed, but the rebel cavalry has potentially turned the flank of the Union line.The firing breaks out, and each side loses about half it's force as the militias collapse into helpless disorder. Fighting for the rebels goes best nearest the river. The rebels press on, turning to outflank the enemy line...In the nick of time, Union reinforcement divisions arrive on the scene. The grey cavalry are scattered and the infantry sent reeling back on their own reinforcements.The hesitating unionists are delayed by small skirmishing groups of Rebels while the remaining infantry form up. The reformed battle-lines clash...Taking losses, the union keeps it's line straight by giving ground to the screaming rebels.Disaster for their morale as casualties mount, including the Northern General Wilcox.The union line is as bent as a snake-rail fence, but can the last division out on the flank save the day? With a crisis at all points on the line, the reinforcing division sends it's brigades in all directions to try and staunch the flow of troops rearward. It quickly descends into chaos. Giving the rebel yell, the grey troops are only barely held back by artillery fire point-blank. Once again the rebels turn the flank by the river, leaving the cannon dangerously exposed, and the disarrayed infantry are in no state to reform. The exhausted Union troops flee to the rear, leaving the field to the exultant Confederates!


