Tuesday, April 24, 2012

Massive SYW Battle!

It's been a while since I cracked out my SYW Prussians and Austrians, but the recent purchase of the Black Powder supplement for the 18th-Century, 'The Last Argument Of Kings,' persuaded me onto it.    


Here's some pics of the one-off battle that resulted.  No points or background, you understand - I just crammed as many figures as I could onto the tabletop and then let rip!


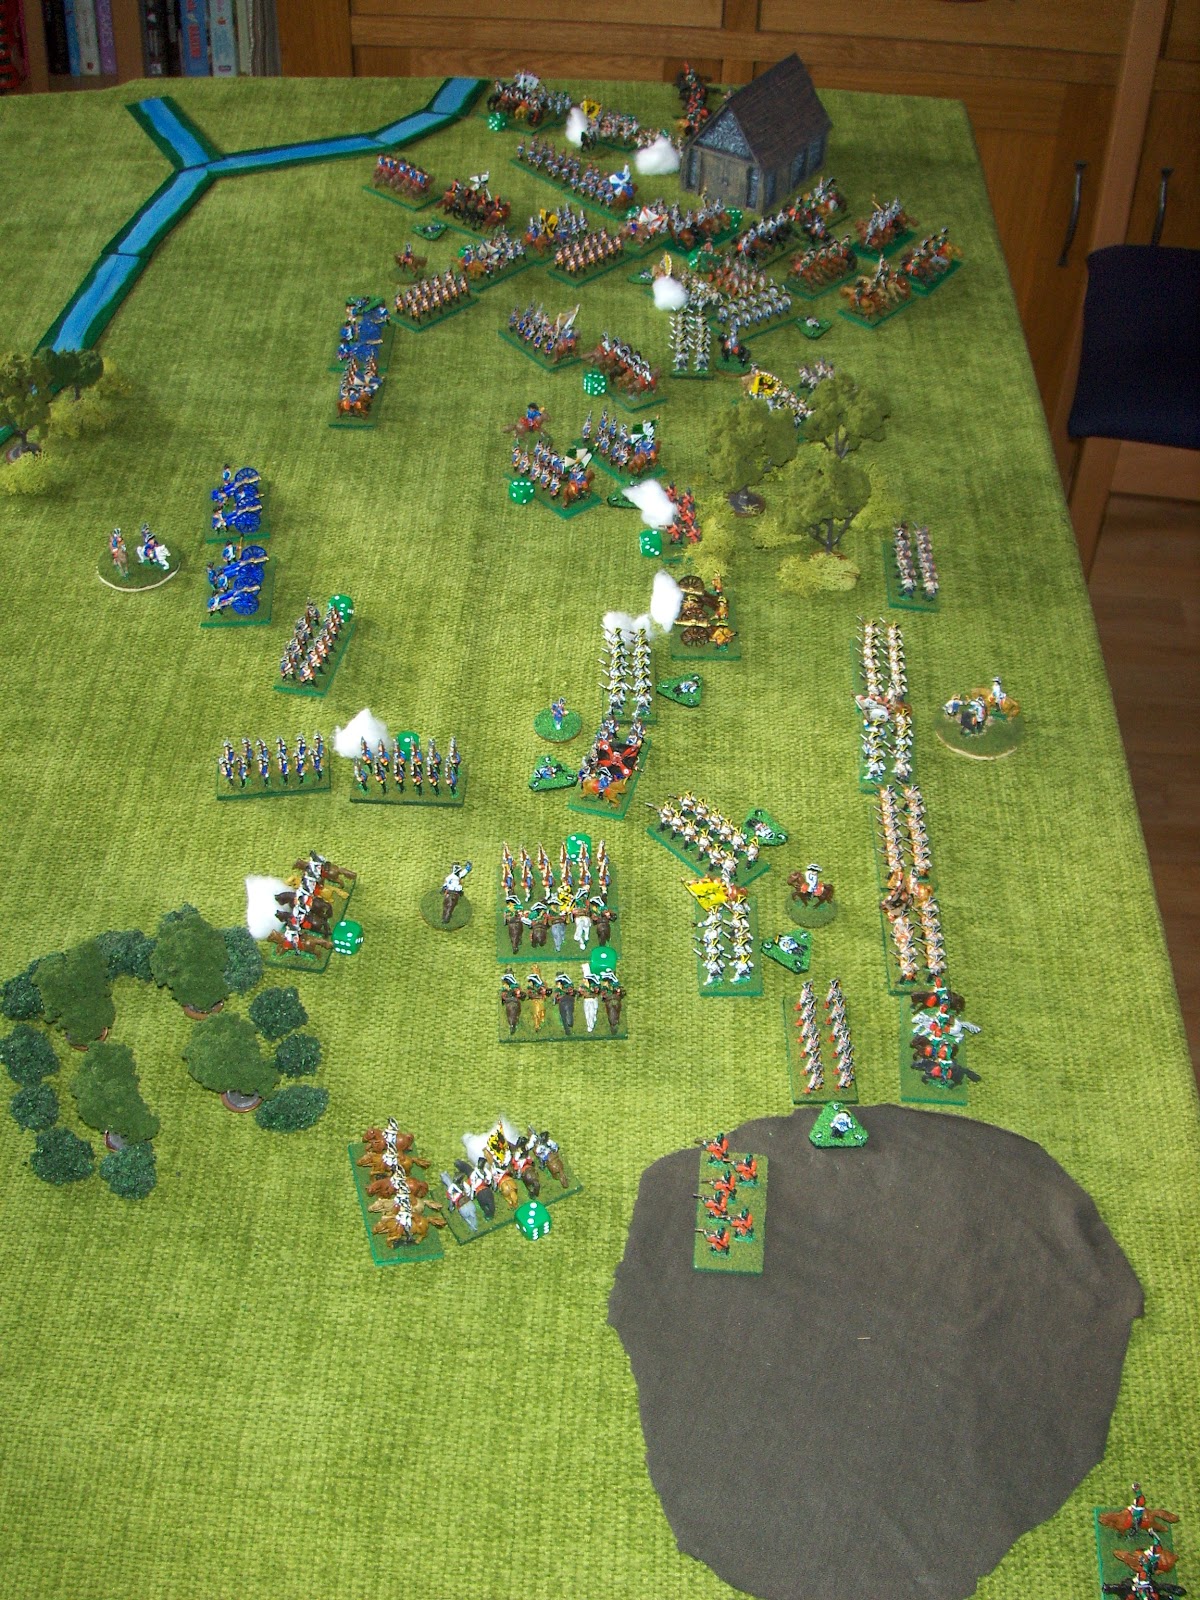
Prussians top-left, Austrians bottom right

The Prussian right wing

The Austrian line awaits


The Prussian right-wing cavalry skirt a marsh, then strike the infantry line


A disastrous blunder on the Austrian right!  The brigade leader wheels in far too early, exposing his own flank.

The Prussians pounce, bringing on a general engagement all along the line.  The mis-handled Austrian brigade is assailed from the front and right.


Back with the Prussian right - the cavalry is repulsed, but the crooked Austrian infantry-line now faces the Grenadiers.

The full panorama, from the Austrian side

The Austrian cavalry largely waits to the rear, while the numerous infantry absorbs the impact.

Blunder on a blunder!  While trying to straighten out his line, the Austrian commander manages a second fumble.  Three of his regiments plough straight ahead in a tight column, threatening to burst right through the Prussian centre - it's just crazy enough to work!

The battle in full swing.  The Prussian right-wing cavalry is exhausted trying to break the infantry line, and is swept back by an Austrian cavalry counter-stroke.

The Prussian infantry bites deep everywhere, but the numerous Austrian regiments are like ants, and the longed-for breakthrough simply refuses to materialise.

Now the triumphant Austrian cavalry turn inwards and turn the Prussian right flank.  The Grenadiers have to turn and steady the line.

The chaotic maelstrom on the Austrian right, where every regiment seems to be fighting it's own little mini-war.  Still, the shaken units keep falling back and fresh ones spring forward to take their place...

The Prussians have had enough!  They finally begin to withdraw, badly rattled themselves and with the Austrian army similarly bruised.


The Prussians extract most of their units and the Austrians try to pull themselves together.

"Victory!"

The dead lie everywhere.  The field of glory can be an ugly sight, sometimes...

"La Garde recule!"

"Schwienehundes!  Wir kommen wieder!"

Sunday, April 8, 2012

Perrys are Evil!

Gaaaaahhh!  Just barely a week since I proclaimed my Wars of the Roses Bows & Bills to be finished, and a major collection basically done, Perry Miniatures throw this out!


WR 40   Mounted Men at Arms 1450-1500  (12 mounted figures) available for pre-order only


And, just for extra 'salt in the wound' coincidence, after my building purchase the other weekend:


RPB 3 Medieval Cottage 1300-1700 available for Pre-order only


D'oh!  Bang goes another pile of money...


More seriously though, this is excellent news.  I was always of a mind to keep the WOTR figures as strictly that.  Even though the 'Mercenaries' boxed set supplied plastic figures for Pikemen, handgunners & Crossbowmen, and it was obviously possible to expand into large mainland European armies like the French, Swiss and Burgundians, I held off.  The main barrier was the lack of a large amount of mounted knights at a cheap price, which was something that blocked any such move.  No longer!  Although I can't go to Salute, I shall no doubt be ordering some very soon and turning my thoughts towards more general Medieval gaming (also possible with the Hail Caesar rules now in my hands.)  


Just when I thought I was out, they pull me back in!

Wednesday, April 4, 2012

Wars of the Roses Battle!


"Fiiiiight!"

Time for a quick, one-off game of Wars of the Roses mayhem, to give the newly-painted figures an outing!


The plan is for a small, knockabout game to give the 'Hail Caesar' rules their first whirl.  Nothing too demanding, so I've plumped for a simple three-units-a-side bash.  Each unit is basically a ward on its own, and to make things a bit more historically flavoured, I've basically copied the 'combined' rule from the Dark-Ages example game in Hail Caesar.  


Basically, to represent that the bows and bills in an army were not typically fielded in distinct units, I allowed them to be combined together into 'Large' units of 30 or 40 figures rather than the standard 20, and given a profile which reflects their make-up (i.e. ranged capability from the archers, but also hand-to-hand ratings for heavy infantry.)  As the combined units become shaken, the stats degrade to the lower troop quality - so the better troops of the retinues are eventually carried along with the levies, once fatigue and losses set in.


Leadership-wise, although I could have a leader for each ward, the guy would basically be commanding one unit - so for this one I decided to issue orders only through the army C-in-C.  The other leaders could fight with their wards and lend combat dice as wished, but no commands.


The forces I've knocked together are roughly along the Towton-esque line - Yorkists have Edward IV, Warwick & Fauconberg as commanders while the Lancastrians have Somerset, Northumberland & Exeter.  It's not a historical re-fight however, just a basis for a simple scrum-down.
The battlefield, with Lancastrians top-left, Yorkists bottom-right

The refight saw the two sides lined up on a 'busy' tabletop, not too large but filled with hillocks, patches of woodland and a small farming village by a road.  Things began with a short Lancastrian advance and some long-range volleys of arrows, supplemented with the occasional boom of Edward IV's cannon returning the fire.  The Lancastrian left, under 
Northumberland, lagged worryingly behind the rest - and all with a large hill in front that they would doubtless need to occupy, if they wanted to secure their position.
The Yorkist army

Seeing the opportunity, Warwick - opposite Northumberland, on the Yorkist right - lunged forward and swiftly occupied the crucial hilltop, although in doing so he put a wood between his ward and the Yorkist centre, making himself dangerously isolated from help.  He swiftly fired a point-blank volley into Northumberland's startled ward, provoking an instant attack by them uphill against his waiting troops.  In the swift clash that followed, Northumberland's ward was shattered by the Yorkists uphill from them, and fled the field with Warwick's men in chaotic pursuit down the slope.  
Warwick takes the hill, and sets about carving up Northumberland

Somerset quickly reacted to the collapse on his flank by turning his ward to engage - a calculated gamble that he would be able to crush the weakened and disordered Warwick before Edward could reach him and engage the centres.  
The battle develops - Warwick's ward is at the top-right corner, and
Somerset turns the Lancastrian centre to face him
Warwick - in the Lancastrian rear, but he's weakened and disordered.

It was not to be.  Clearly the little lead Edward IV was channelling some of his forebears' agressive energy, as he rolled for 3 moves - instantly sweeping across the field and crashing right into Somerset's momentarily-exposed flank.  It was too much for the dazed Lancastrians, who broke and fled in chaos, leaving Somerset himself dead on the field (there's gratitude for you...)  
The Yorkists close in, with Somerset being struck in the flank by Edward IV's Centre
Edward IV - a firm believer in 'rolling deep!'

Altogether, a spectacular Yorkist victory largely decided by two lucky command-rolls which saw 
Warwick first sieze the cricual hill on the east of the battlefield to turn the Lancastrian line, then Edward's sweeping charge that crushed the centre.  


Interesting to see the rules in action.  There were some 'teething troubles' as is to be expected on a first-outing, such as a belated understanding of triggering break tests through ranged fire.  Overall however, the game played surprisingly swiftly - barely an hour, where 'A Coat Of Steel' would have probably taken three times as long.  It didn't lack drama either, as both sides needed to make tough calls about the risks/rewards of committing their wards into action.  

I will definitetly be using Hail Caesar again for a WOTR game, and I think adding more units to give each ward/command about 3 or so units would be a good development.  The combined units of bows and bills together also seems to work very well.  

Sunday, April 1, 2012

One man and his shed (or barn)


I've made a rare purchase, and also reached a painting milestone!


"Doesn't it look lovely, men?  Burn it down."

I have recently managed to complete painting on all of my Wars of the Roses figures, which has been a monster project for some time.  Well, perhaps not 100% complete, as there are some mercenary pikemen and handgunners lurking about - but the longbowmen and billmen that make up about 90+% of the armies are finally finished!  I intend to celebrate by having a quick one-off game shortly, using the Hail Caesar rules I got at Xmas (where does the time go?)


I also celebrated by a rare thing for me - purchasing scenery!  I was in Glasgow at the weekend and found myself bringing back the mini-haul of a copy of 'Last Argument of Kings' (the supplement for 'Black Powder' covering the 18th Century) when I got some odds and ends: including some flocking, plus a small model building that'd be excellent for Wars of the Roses.  It should add itself nicely to a few battlescenes - provided it escapes the attentions of foragers!